If you haven’t heard of Nima, eh where have you been living? 🙂 They are an Irish owned makeup brush owned created by the lovely Niamh Martin. I’ve waffled loads about different brushes here on Beautynook in the past. I’m a big fan. Nima Brush’s last big release was the Artistic Collection which I spoke about in more detail here if you fancy a nose.


Nima Brush’s newest additions to their every growing brand is the ‘Girls On Tour’ Travel Set. They are seven of some of the most loved brushes from the Artistic Collection in a more travel friendly form, and in a really cute Nima pouch. The set costs €55 and you can pick it up from the Nima site here.

First off, how gorgeous are these brushes? If you are on the hunt for a Christmas pressie for a makeup lover…or a treat for yourself, I think Nima have you covered. The Girls On Tour Set would be great for bringing on holidays or just to have in your handbag for touch ups.

Nima Girls On Tour Travel Brush Set


I think the choice of brushes are really thought out and have you everything you need for doing your makeup on the go.

Here’s the low down on Girls On Tour:


The ‘Blaithin’ is included.

irish beauty blog beautynookirish makeup and beauty blogger

This is probably my most reached for Nima Brush, I have the full handle sized version. I use it for contour mostly which you can see in action here but I love it for blush and powder too.


We also get the ‘Jane’.

irish beauty blogirish beauty blogger

The softest duo fibre stipping brush ever!

The ‘Tara’.

top irish beauty blog top irish beauty blog beautynook

Perfect for blush, bronzer,contour the works.

The ‘Girls On Tour’ set also contains another one of my favourites from the Artistic Collection, the ‘Debs’.

irish makeup and beauty bloggerirish beauty blog

This is a gorgeous blending eyeshadow brush.

The ‘Patricia’

irish blogbeauty blogger

A duo fibre tapered eyeshadow brush.


The ‘Ollie’.

beauty blogger beautynookbeauty blog beautynook

I would describe this as a smudger brush, perfect for the lash line.


And finally, the ‘Danielle’.

irish makeup blogirishbeautyblog

Danielle is an angled duo fibre brush. I would use this for brows,liner or even lip definition.

The only real differences between the Girl’s On Tour collection and the Artistic Collection version of the brushes is the slight change in colour and the length of the brush handle. The actual brushes are  the same great quality that we’ve grown to expect from Nima.

I have small child like hands so for me the Girls On Tour set will probably end up becoming part of my everyday makeup. For now, I’m trying really hard to keep them to bring on holiday with me next month…wish me luck 🙂

xxx


Lash application is one of those things that just comes to you after practice, I think. I was crap at it when I first gave it a go, but I’ve done it so much over the years now that I don’t even think about it.

If you’re new to the lash game, something like this kit from Kiss is a really handy place to start.

Kiss LashesKiss do all different styles of lash in these Haute Couture lash kits. This is the wink style, which give more volume and length to the centre and outer lashes.

Kiss Wink LashesThey all come with a handy lash application tool and some Aloe Vera Adhesive, which is meant to be more gentle so good if you have sensitive eyes.

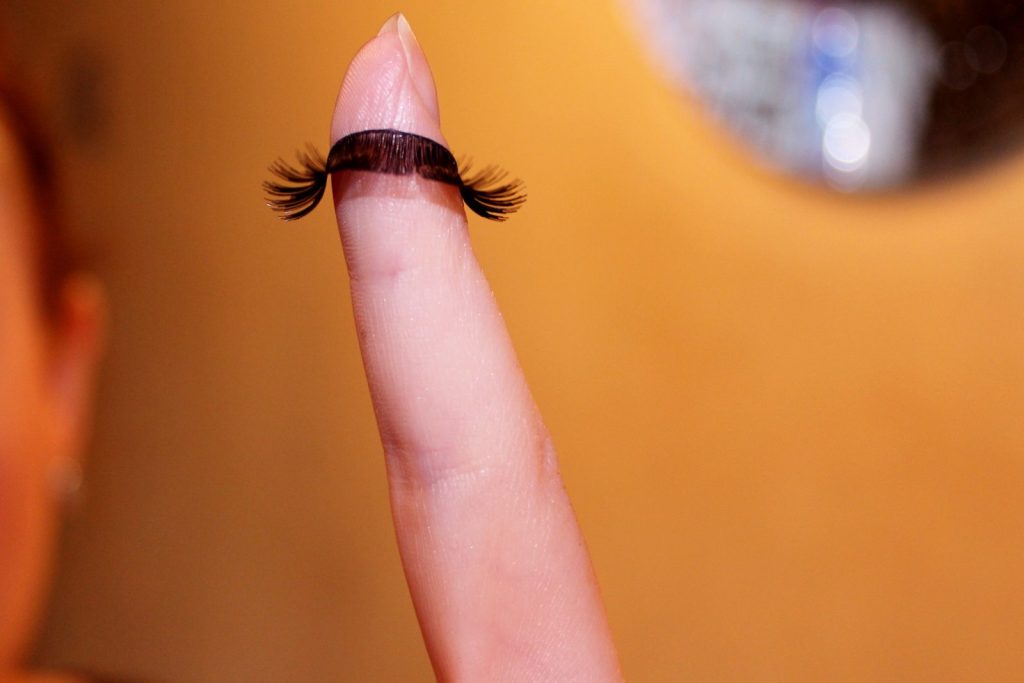
When I use lashes for the first time, I like to bend the band on them a little. So, to do this I just twist the seam of the lash between my fingers and then basically form it around my finger.

Fake lash tipsfalse lash tricksDoing this makes the band (especially a thicker bank) a more of a rounder shape, so it will fit to your eye better and make lash application easier.

Then, I grab my lash glue.

irish beauty blogThis Kiss one is actually really handy because if has a little applicator on it, so you can easily apply it to the lash. The key to application is only apply a thin layer of glue to the band of the lash, then give it 20 or so seconds to become tacky. If the glue isn’t tacky, the lash will slide around your eyelid and things just start to get messy.

The more you apply lashes, the more you’ll know what tool is best to use for you for applying the lash onto your natural lashes. For me, I’m more comfortable placing it down first with my hand.

lash applicationDrop the lash into the centre of your eye as much as you can. It means you have a couple of second to adjust if the lash isn’t where it should be.

irish beauty bloggerThen, I grab my tool or tweezers, and tuck in the edges 🙂

irish beauty blog beautynookYou can use it to squeeze the fake lash into your real lashes aswell, so you don’t have any gaps showing and they are as close to your natural lash line as you can possibly get them.

The Kiss Wink lashes don’t go right into the inner corner of my eyes. I personally like this because it means if there is any lifting throughout the day or night, I won’t be getting poked in the eye ball. We’ve all experienced that right? It bloody hurts! A good tip is to actually measure your false lash to your eye before you apply it and trim any excess.

irish makeup and beauty blogThe Wink lashes don’t have an invisible band though, so to make them look more flush with my lash line, I use a liquid liner to just continue the line across my lash line.

Physicians formula lash booster eyelinerSo there’s one eye finished. Definitely makes a difference, right?

makeup and beauty blogThen I just recreate what I did on the other eye as best I can. Don’t give yourself a hard time if the falsies aren’t completely symmetrical, your eyes aren’t completely symmetrical!

makeup blog irelandbeauty blog irelandI finish off by adding another slick of mascara to my top lashes, to just make sure falsies and naturals are all married together and looking the best they can.

Lashes like these Kiss ones can be used more than once if you’re careful taking them off, so get your monies worth ladies. You can remove any excess glue with a tweezers and put them back into their handy little case.

There you have it, my top tips for lash application. Hope they helped 🙂

The Kiss Haute Couture Lash Sets are available from Dunnes and some selected pharmacies and they cost €21.99.


xxx

I am a makeup lover, not a makeup artist. But I do enjoy slapping the slap on, so I thought I would start doing little step by step posts. Hopefully they will do down well 🙂

I did a really easy Autumn appropriate eye look using my favourite (I think) from the Naked Palette the Urban Decay Naked 2.

Urban Decay Naked 2First up in this Urban Decay Naked 2 look, I primed using their Primer Potion, I would be nowhere in makeup land without primer! I just used my finger to add a small amount all over the lids.

urban decay primer potionpriming lidsThen I used the Maybelline Color Tattoo in ‘Pomegranate Punk’  as a base colour on my eyelid.

maybelline color tattoomaybelline color tattoo pomegranate punkI just patted this on with my fingers, not taking it above the crease of my eye and used a synthetic blending brush to blend away any harsh edges.

irish beauty blog beautynookshadow blendingTime to crack open the Urban Decay Naked 2 palette 🙂

To ensure any shadows I was going to use blended easily on my lids, I just used the same synthetic brush to add a wash of ‘Foxy’ from the crease up, it’s just a matte skin coloured shadow.

urban decay foxyeyeshadow blendingUsing a Nima ‘Debs’ brush.

Nima Debs BrushI dipped it into the shade ‘YDK’ from the palette.

urban decay YDKI applied this on top of the Maybelline Color Tattoo.

urban decay makeup lookThis shadow has alot of fallout, in fact most Urban Decay shadows do because they are so soft, so I suggest waiting to do your concealer or even your whole face until after the shadows are applied.

makeup tutorialOnce I was happy with the colour on the lids, I cleaned off the Nima brush and dipped in into ‘Tease’

urban decay teaseIt’s a matte purpley taupe shade so works lovely as a crease colour.

And so I added this softly into the crease in window wiper motions and built up the colour in stages. easy peasy right?

easy purple eyeshadow lookFor an added little bit of dimension, I took a smaller brush, this is the Real Techniques ‘Essential Crease Brush’.

real techniquesI went into the shade ‘Busted’ and just added a small amount to the outer V of my eyes.

urban decay busted

makeup blogNot necessary, but adding in a bit of darkness makes it look a little more dramatic I think.

irish lifestyle blogI then took the lightest shimmery colour in the Urban Decay Naked 2 palette ‘Bootcall’ and applied it to my brow bone.

urban decay Bootycalleasy purple eye lookmakeup tutorial irelandProbably not a step everyone likes, you might prefer a matte, but for me I like a bit of shine there sometimes 🙂

Instead of lining my lid with a black or brown, I chose this Barry M pencil in ‘Bold Purple’. It’s a true purple with a bit sparkle running through it.

barrym bold purple eyelinerI applied it from the pencil, it’s nice and soft, and then I got it right into the lash line with a little liner brush.

irishbeautyblogstep by step makeup tutorialI applied some mascara to my upper lashes and then for the lower lash line, I just blew out some ‘Busted’ shadow under there and left it at that.

easy makeup tutorialI lined my waterline with L’Oreal Infallible pencil in ‘Night Day Black’. This is a dark grey colour.

L'Oreal Infallible Eyeliner 'night day black'If I knew I was out for the whole night I probably would have switched up this step and used a gel liner instead.

irish lifestyle blogI added mascara to my bottom lashes then.

Final touch, again unnecessary and not for everyone, I used a pencil brush to apply some of the ‘Bootycall’ shade to my inner tear duct. I love doing this step, I think it just brightens my eyes and because I used purple shades it covers any purple under tones that might be visible on my skin there.

irish beauty blogAnd there you have it, my really simple and of course unprofessional cool toned purple look using the Urban Decay Naked 2 Palette.


beautynook beauty blogirish bloggerirish beauty bloggerxxx


Ok ‘essential’ is a bit of an exaggeration. Maybe which brushes make life a bit handier? That aren’t foundation that I spoke about here or eyeshadow brushes that I speak about here? That’s more of a mouthful though 🙂 And I promise it’s just a coincidence that I have five here like the other lists.


A blush brush is definitely one of these. It’s handy to have a makeup brush dedicated to this task.

beautynook irish beauty blog

Blush is usually pink or peach and you don’t necessarily always want them colours on the rest of your face, so pick up a smallish, soft brush. One that will fit the apple of your cheeks but still blend the colour in.

irish beauty blog

A concealer brush is handy, but of course not a necessity.

nima brush irish beauty blog

I know you can just use your foundation brush (or your fingers). It’s handy to have a smaller, dense synthetic brush to apply concealer though. You can get into all the nooks and crannies of you face with it.

beautynook irish beauty blog

A powder brush for me, I think is pretty necessary in this business we call makeup application.

beauty blog real techniques

You can have one to apply your setting powder and bronzer or one for each, it’s up to you. I think if you were to have another brush, grab a large fluffy variety and even a smaller one for under the eyes (if you’re feeling really fancy) or like to use a different powder under there like I do. 🙂


Ok contour.

essential makeup brushes

I know not all of us do it, nor do all of us give a crap about it, but if you do and are interested, there is many a brush to help you on your contouring journey.

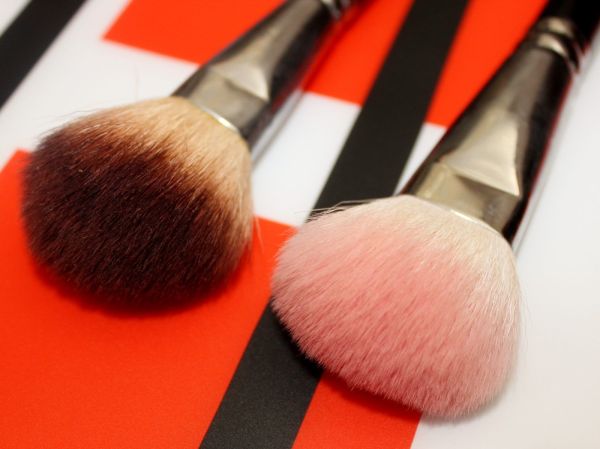
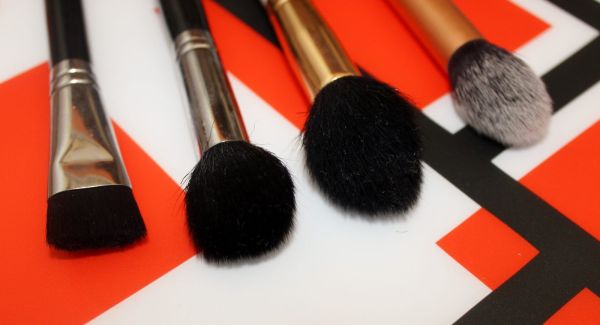
Flat paint brush types, tapered fluffy types or even small rounded types. There’s one for all! If you want a stronger contour, choose a denser brush like the paint brush, but if you want to add a more diffused contour grab something tapered and soft.

makeup brush

Ok, last unnecessary but necessary brush. One for highlighting.

beauty blog

Again this all depends on your highlighting needs, if you don’t do it, you don’t need a brush and if you just use your fingers, that’s perfectly acceptable. This is just another brush option, if you want one 🙂

As you want to use a light hand with a highlighter…well I’m assuming you do? So a fan brush is a great brush to have (although I cannot find mine to use as an example sorry). Or a mini duo fibre brush works really well, as you can just use the top less dense layer for application. Anything smallish with a soft lightly packed bristles is good for the job really.

beautynook beauty blogWhat do you think? Too many makeup brushes? If you are a full on makeup junkie, you’re probably thinking eh Gemma where’s the rest of them I know 🙂

Thanks for reading as always and be sure to follow me on social media for the chats. Snapchat is becoming really handy for that. I’m Beautynook over there.

xxx


I popped up a post about the top five eyeshadow brushes to have in your collection last week here and it went down really well. So I thought I would add onto this and talk about my top five foundation brushes. Now I’m not saying you need five foundation brushes in your life, that’s just for beauty junkies like myself who just can’t stop buying them. I just thought I would list five different types of foundation brush that are on the market and explain a bit about them and you can just pick your favourite from the bunch…or all of them… it’s you prerogative really 🙂

irish beauty blog beautynook

First up I have, the kabuki style brush.

irish beauty blog beautynook

These come from all brands in all shapes and sizes.

kabuki brushes

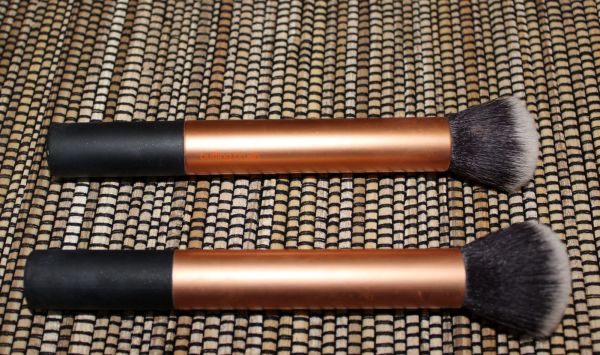
They are a basically a tightly packed, (hopefully soft) synthetic foundation brush. They can apply alot of product and do it quickly and can be used to really buff foundation into the skin. These are probably my favourite type of foundation brush, as I have large pores and I find I can get the foundation into the pores really well with a kabuki brush and fill them in.


Next up is the old school flat foundation brush.

flat foundation brush

I only have one of these in my brush collection, because for me personally it’s not my favourite application tool.

real techniques

However alot of people love using this type of brush for applying foundation and then even using something like a beauty blender to work it into the skin more. For me, I feel a flat brush leaves the foundation sitting on your skin more, it tends to apply like a paint brush. I have oily skin, so for me especially this doesn’t bode to well throughout the day. Again, it’s just personal preference really 🙂

Here we have the stippling brush.

blank canvas cosmetics

The stippling brush is a duo fibred brush. This means it two different types of fibre within the same brush. It has denser (usually darker) bristles at the base of the brush, with lighter looser packed bristles at the top, which are again synthetic hairs. Synthetic bristles are much better for creams as the the product doesn’t soak into them and disappear as much as it would real hair.

zoeva stippling brush

A stippling brush as you would assume is softer on the top, so you can really massage your mug with it in whichever way you prefer depending on the pressure you use. You can kind of have the best of both worlds with it.

Buffing brushes are next in my top five.

buffing brushes

These are like a less densely packed kabuki brush.

irish beauty blog beautynook

So they splay out more as you use them to work your foundation in. Because of this they give a less concentrated coverage, so a lighter coverage of product ensues 🙂

Ok the last brush I’m going to talk about is not a brush at all. But I wanted the title of the blog post to be the same as the eyeshadow one so apologies (I’m sad I know).

beauty blender

So makeup sponges!

Sponges have been used since the dawn of time to apply makeup so there’s nothing new here really.

You can buy packs of them in the euro shops for next to nothing. I personally would say dampen the sponge before you use it, it makes for a smoother application and it doesn’t suck up all your foundation. Sponges like the Beauty Blender and Real Techniques ones I have here market themselves to be dampened, but the cheaper one wouldn’t always tell you so tis’ a handy little tip. Sponges are a great tool for using after your foundation brush aswell, to just roll on your skin, and take up any excess product and just make sure your work is blended as much as it can be 🙂


So there you have a little synopses of  some of the foundation brushes on the market :p

Of course there is a million and one ways of doing it, this is just a break down of a few I have tried and tested.

Cheers for reading as always.

xxx


When I say top five eyeshadow brushes, I don’t mean you have to run out and buy these specific brushes. I just mean having similar brushes in your life will make your eyeshadow application a little bit easier.

I’m a firm believer in letting your eyeshadow brushes do the work for you. Obviously, makeup lovers tend to accumulate alot of brushes over time, but if you take care of yours, I think 5 (or so) will get you through any makeup look.

First and foremost, you need a blending brush.

irish beauty blog blending brushes

Blending brushes can be used for pretty much everything.

irish beauty blog

The Mac 217 is probably the most infamous blending brush, but most brands have their own version of them nowadays. I use a blending brush for applying my crease colour and blending it out softly . As they have a rounded top, you use the higher bristles to apply the products and then diffuse it using the whole of the brush. It’s handy to have two blending brushes in your collection so if the one you are using gets too much product on it, you can switch, but you can always just wipe it off as you go. Noone wants a muddy crease line do they? 🙂 A blending brush works just as good for applying colour all over the lid to, so it’s a bit of a multi tasker in your arsenal which is never a bad thing.


For more defined crease work a tapered brush will come in very handy.

nima brush beautynook

These are just examples of what I use, but again anything similar you can get your hands on will work fine. You just want a soft(ish) brush with a more pointed top. It will let you isolate the colour more when adding it to the crease, so you get a more distinct line there, but you can still use it to feather out the colour if it’s looking a bit too harsh.

irish beauty blog beautynookA flat brush is a great one to have in your collection too and is definitely a part of my top five eyeshadow brushes list.

flat shader brushesSomething you can pack colour onto the lid with. It’s great to have a bigger one and a smaller one, but whatever your budget allows is really ok. You just don’t want something too big, unless you’re just using it for washes of colour all across the lid.

beauty blogI think a pencil brush is another essential brush to have in your collection.

pencil brushLike a blending brush, they can be used for a plethora of reasons. To apply colour under the lash line, above the lashline, in the tear duct, on the brow brone, or for applying very precise lines in the crease, if you are being particularly fancy.

irish beauty blogFinally, I think an eyeliner brush is a must.

nima brush inglotI think which one you choose comes down to comfortability really. Whether you are a bent liner brush gal, a straight thin brush, or one of an angled variety, there’s one of to suit all.

top five eyeshadow brushes

There are so many brands out there now that do fab eyeshadow brushes, for all different uses and price points. Sigma, Zoeva, Louise Young, Real Techniques, Mac the list is endless. And us Irish have some fab brands on our doorstep like Nima Brushes and Blank Canvas Cosmetics which is pretty brilliant.

When it comes to real hair or synthetic, just remember don’t apply liquid products with real hair brushes, it will soak up all the product and it will probably damage your brushes in the process too. Synthetic brushes are much more suited to this and you can apply powder with them aswell.

There you have it my top five eyeshadow brushes. I hope that was somewhat helpful, if you’re in the market. If you have any more questions, just ask me in the comments sure 🙂

Thanks for reading.

xxx